We’ve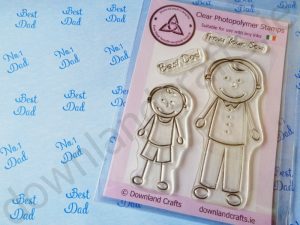 been asked many times to do some card making project posts here on our blog, especially ones focusing on stamping which as you know is one of my favourite things to do. We aim to please so here’s your introduction into making cards using one of our stamp sets ‘From Your Son‘ and also one of our free to download backing papers ‘Dad Friday Freebie‘
One thing we heard from our customers is that sometimes you are happy and confident to stamp your image but then you don’t know what to do with it afterwards, how to colour it and how to construct a card from it. There are loads of things you can do with a stamp and a background paper, however, we wanted to start you off with something simple and we will progress into more detailed projects in the coming posts.

Firstly stamp your image onto a piece of white card that is larger than you need. It doesn’t matter at this stage whether the stamped image is straight or centered as we have allowed enough space around the image to trim later. I used an archival ink to stamp with as it gives me a crisp impression but for this project it really doesn’t matter which ink you use so whatever you have will be fine. I also stamped the sentiment ‘Best Dad’ from the same stamp set onto another small piece of card.
 The next step is to colour it in. I have chosen to use straight forward colouring pencils for this to show that you don’t need to invest in expensive pens to start with to get great results. It often depends what type of image you are working with as to which colouring medium works best, other times it just comes down to personal choice.
As this image is simple line art I feel that colouring pencils work well and are ideal to get you started, the same image would also look great with watercolours and alcohol markers. One tip I will give you is to colour with your pencil on its side, this way you get a much softer, blended finish rather than harsh lines. Don’t be worried about white space, you don’t need to colour in every single thing, unless of course you want to. I personally think leaving a few white areas adds to the effect. For instance I have left the hands and face white, you could add a little bit of soft pink to the cheeks if you have a suitable colour. Also don’t use too many colours but rather stick to a limited palette.
 It’s a good idea to use a complimentary colour to tie in the background as you can see I have done by using blue on the image to match the backing paper. It’s also a good idea to play around with the layout before you fix your topper and sentiment in place. Here are 3 suggestions of how you could go. Only when you’re happy should you go ahead and stick them down.

In a later post I’ll be showing you how you can achieve fantastic results with all kinds of fancy mediums but we don’t want to jump ahead too quickly or make you feel like you need to spend a fortune on lots of different products so for now we’ll stick to the basics and allow you to get started with a very small budget. You can also find more information on which inks work best with which colouring medium in another of our posts called ‘Which Ink Pad Do I Choose?‘

After a bit of playing and moving things around I decided to go with this version.
I hope you’ve enjoyed this card making tutorial and if you would like to see more of these project posts please let me know.
Until next time, happy crafting,
Trish x
Great tutorial Elf Boss!
Thanks Elfie, I hope it helps 🙂
I am sure it will help a lot of people.
Fingers crossed, getting a great response so far 🙂
I love sending cards and only just started making some. I have a bunch of stamp but was a bit confused and intimidated about using them (I bought them for the kids years ago.). Thank you for a quick simple tutorial that definitely encourages me to just get started!
Thank you so much Mary and I’m so glad it’s encouraged you to get those stamps out. I was a little intimidated myself about writing my first card making tutorial so your positive comments mean so much.
A great tutorial for a beginner, or someone new to stamping. You turned a stamped image into a really cute card Trish….looking forward to your future posts too. I love stamping, just never think outside the box nor use my collection enough!!
Thanks Mary, I promise this is the start of many more tutorials. Sometimes simple is good, especially when you don’t have a lot of time to play.
So simple when you start out but want to progress more and don’t know where to go. But love this tutourial
We’ll get to some more complicated techniques later for sure, hopefully people can learn with us as we progress.